 Points Test
 Book Now
 This step-by-step guide will show you how to register your company on the Jobactive website.
To register for a new Jobactive account, you will need:
1. Set up a myGovID
2. Link your ABN with Relationship Authorisation Manager (RAM)
3. Sign in with myGovID
Set up a myGovID
Please follow instructions on this page to set up a myGovID for your business if you do not currently have one. You will need a smart phone and a personal email address. Then follow these three steps:
- Download the myGovID app
Download the myGovID app from the Apple App Store or Google Play.
- Enter your details
Open the myGovID app and follow the prompts. You need to enter your full name, date of birth and email address.
After entering these details you’ll have a Basic identity strength. A Basic identity strength only allows access to limited government online services; while a Standard identity strength allows access to all participating government online services
- Verify your identity documents
A Standard identity strength requires you to verify two of the following Australian identity documents (your name must match on both):
- driver’s licence or learner’s permit
- passport
- birth certificate
- visa (using your foreign passport)
- citizenship certificate
- ImmiCard
- Medicare card – once you verify one of the documents above in the app, you’ll have the option to add your Medicare card.
The personal information from your identity documents are checked against existing government records to confirm your identity. If your name doesn’t match across your two identity documents, you may be able to verify this using a change of name certificate (Tasmania, South Australia, Northern Territory and the Australian Capital Territory only) or marriage certificate.2
Link your ABN with Relationship Authorisation Manager (RAM)
Please follow instructions on this page to link your ABN with Relationship Authorisation Manager (RAM).
- Click the link below and log in to RAM using your myGovID.
https://info.authorisationmanager.gov.au/

2. This will take you to the myGovID page to Login. Enter your myGovID email.

3. Open myGovID on your phone and accept of enter the code.

4. Press ‘’Link your business’’ to link the ABN of your business to your myGovID by following in the prompts.

Alternatively, follow this: https://info.authorisationmanager.gov.au/principal-authority
- To link five or fewer ABNs:
phone 1300 287 539 and select option 3
you’ll need to provide personal details to complete a proof of identity check
checks will be completed to confirm your association to the business
once confirmed, you’ll receive an email with an authorisation code and summary of the authorisation request
log in to RAM using your myGovID to accept the request and complete the link.
- To link more than five ABNs, you need to complete the Assistance to link bulk ABNs form. Once submitted, we’ll contact you to complete a proof of identity check.
Your first and last name recorded in any of the above must match your name as displayed when you’re logged in to RAM. Your name appears in the top right corner.
Once linked, you’ll be authorised in RAM to act on behalf of the business and can set up authorisations for others to act on behalf of the business.
Your authorisation type will display as government representative, indirect associate or responsible authority. These authorisation types are valid for up to 12 months. Before expiry, you’ll receive reminders to the email address you used when linking to the business, as well as a notification in RAM to remind you to renew.
Your renewal doesn’t affect authorisations you’ve set up for others, they can continue to access government online services on behalf of the business.
- If you are a principal authority or authorisation administrator, you can create authorisations for employees and other individuals to work on behalf of the business.
Sign in to Jobactive with myGovID
- Go back to Jobactive and sign in with myGovID. Remember to use your personal email address, not your work email.
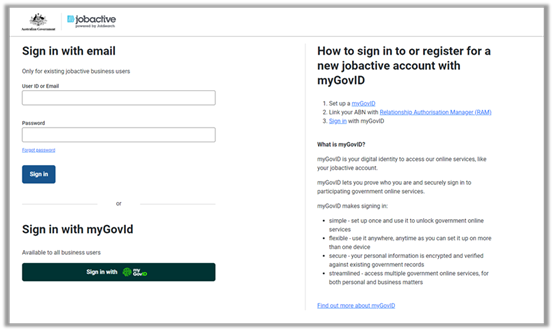
2. Agree to Conditions of Use.
3. This will take you to the myGovID page to Login. Enter your myGovID email.

4. Open myGovID on your phone and accept of enter the code.

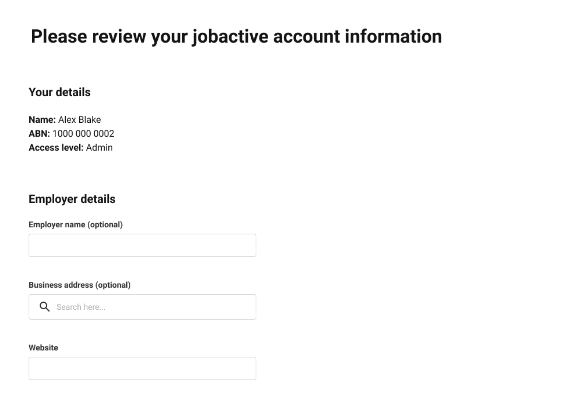
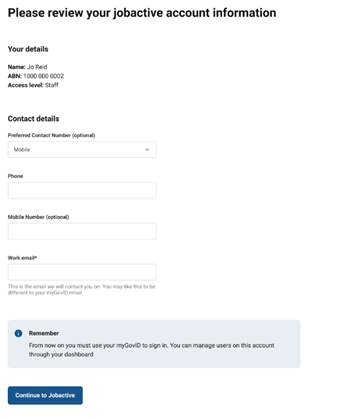
5. Review your account information:
- For Administrators

- For Users
6. Employer Dashboard
You will be directed to a personalised Dashboard once you have signed in to your account.
From the Dashboard you can create and manage jobs, save jobs as templates and track and monitor job applications online.

Create A New Job
There are six steps to create a job.
Step 1 – Title and Occupation
- Click the ‘Create a Job’ link from the top navigation menu on your Dashboard
- Enter a Job title for your Job
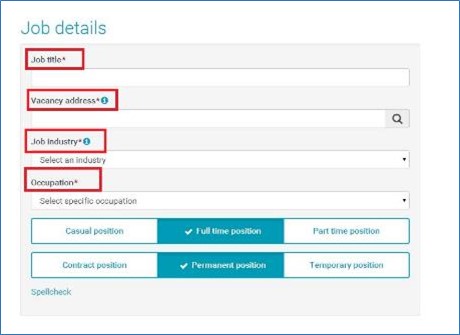
3. Enter the address of your job.
Note: if your address is not returned in the predefined list, type in some random characters which will trigger the ‘can’t find your address?’ checkbox. Ticking this box will display a screen to allow you to manually enter the address.
4. Select the Job industry from the dropdown list. This will define the Specific Occupation list
5. Select the Specific Occupation of your job from the dropdown list screen
6. Select the Work Type and Tenure (ensure your selection is highlighted)
Step 2 – Job Description

- You will then need to provide a description of the role. This should include the following information:
- A list/ description of the duties and responsibilities of the role; and
- The employment experience, qualification or registration requirements of the role.
- There are three options that you can select in how to apply:
- apply online;
- email the address provided; or
- please see description (in above job description).
- The number of positions – this must be at least one;
- Expiry date – to take in account any delays with Jobactive posting the advert and to ensure that it runs for at least 28 consecutive days, we recommend setting the expiry date to the maximum allowed, which is currently 32 days.
Step 3 – Additional Information
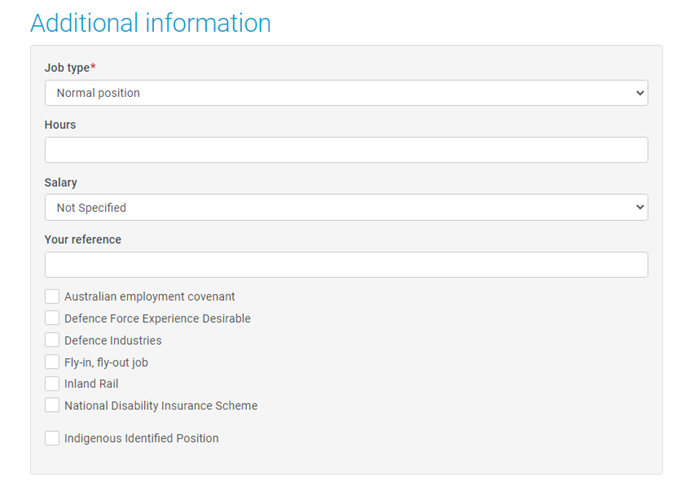
- Job Type – please select ‘normal position’ to ensure this satisfies the TSS Subclass 482 visa criteria;
- Hours – please enter at least 38 hours;
- Salary – in order to ensure that this satisfies the TSS Subclass 482 visa criteria, we would recommend selecting one of the following options:
- $40,000 to $60,000
- $60,001 to $80,000
- $80,001 to $100,000
If the salary will be over $96,400, then it is not a requirement for the salary to be listed on the job advertisements and you can also list ‘not specified’ in this scenario.
- If relevant, please include an internal reference number and select from any of the above options
- You will also need to confirm the contact details for the company representative
- You can also add any extra questions
Step 4 – Contact Details
- Contact Details are auto populated with the employer’s details (not user details), as provided at the time of registration
- You can change the contact information for a particular job if required
Note: The contact information will default back to the employer details that were provided at the time of registration when creating another job vacancy except if using a Job template.
- You can check the spelling of the job you have created by clicking the Check Spelling button
Step 5 – Questions for Applicants
- Press ‘Add’ to include up to five questions for applicants. There are five different answer types to choose from.

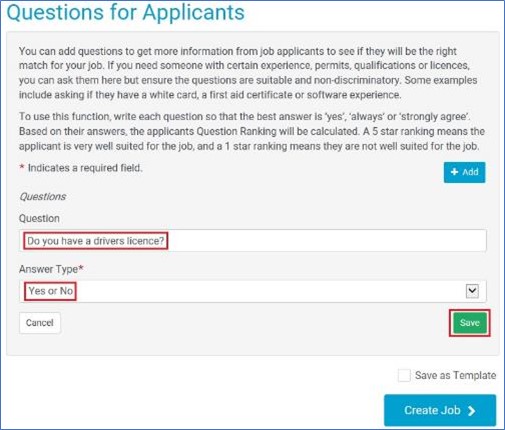
2. Happy with your created job? Click the ‘Create Job’ button to upload to the website.
Note: You can invite providers to help you with your recruitment. Refer to Section 9.1 Contact Provider
You can then click on the ‘Create Job’ button at the bottom of the page.
The advert will then be sent to Jobactive for a member of their team to review and the advert will be assigned a Job ID. Pending jobs normally appear on Jobactive within 2 to 48 hours of being submitted and the 28 day requirement will start from this date.
Should receive notification.
Need a screenshot that confirms the Jobactive ID and the date that it was posted.
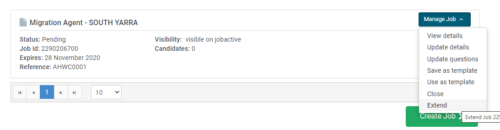
Extend through dashboard.
You can now view this job in your My Jobs section. If it is not listed in the ‘Open’ jobs list, use Status to select ‘Pending’ and click Search. A Pending job will move to the Open Status section once it has passed compliance checking and is displayed on the website.

WARNING: Jobactive Date Error
Currently there is an issue if you update or edit a Jobactive advert once it is active, the posting date resets. This means that in order to evidence that the Jobactive listing has been active for 28 days, the advert would need to be listed for a further four weeks from the date it was updated/edited to satisfy the labour market testing criteria.
The Workaround: If you need to list the advert for longer to ensure that it has been posted for 28 consecutive days, you can extend the expiry date through the My Jobs section, which is accessible through the dashboard. You can select Extend from the ‘Manage Job’ drop down selection.